Welcome! I have been helping my fellow aspiring crafters learn something new about the Cricut machine. In this blog, I will walk you through a comprehensive guide on Cricut pens and markers. Plus I will also give you a step-by-step guide on how to complete a project with Cricut markers and pens.
Cricut pens & markers are specially designed to fit perfectly on Cricut machines to produce stunning results. Follow me through the blog to learn more about them in more depth. So, let's get started without wasting any further time.
Essential Supplies to Use With Cricut Pens and Markers
In order to learn how to use pens & markers and create a project, it is necessary to understand the essential supplies it requires. These are some supplies you need for that.
- Cricut smart cutting machine
- Cricut apparel blank (compatible with Infusible Ink)
- LightGrip machine mat
- Infusible ink pens or markers
- Lint roller
- Tweezers
- Cricut Design Space software on a mobile device or computer
- Cardstock (80 lb.), White (colored cardstock not recommended)
- Cricut EasyPress, Cricut EasyPress 2, or Cricut EasyPress 3
- Heat Resistant Tape
- Cricut EasyPress mat
- Laser copy paper
- Butcher paper
- Scissors
- Cricut Heat Guide or Cricut Heat app (The app works with only Cricut EasyPress 3)
The Process of Using Cricut Pens and Markers for Creating a Project
Follow the below procedure step-by-step to create designs with the Cricut pens & markers.
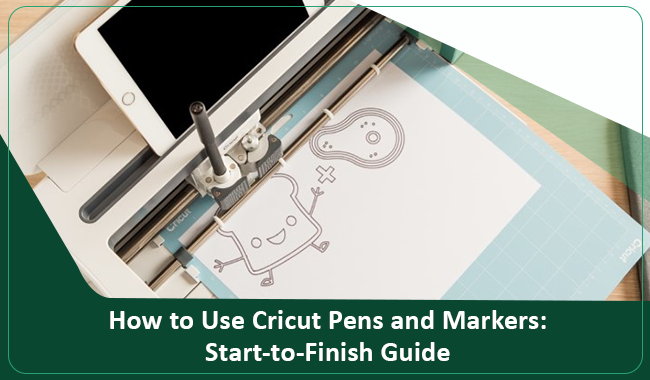
Step 1: Drawing a Design on the Sheet
- For the first step, keep a laser copy paper on the mat (Cricut LightGrip) and insert it into a Cricut cutting machine.
- Now, open the Cricut Design Space app on your device connected to your cutting machine.
- Afterward, choose the designs and resize them according to the apparel blank.
- Next, you need to set the Linetype to Draw.
- Also, choose the color of your Cricut pen and marker. (also, make sure to turn on the mirror toggle before moving forward.)
- Go to the browse material section and choose the option of Copy Paper.
- Then, specify the cutting machine you are using. (If you are using Explore Air 2 or any other previous device, then choose a Custom option on the dial).
- Now, insert the Cricut pens and markers into the clamp of your cutting machine.
- After that, follow the process to draw the design on the paper.
- Once the process is complete, then unload the mat from the machine.
Step 2: Preparing the Blank Apparel
- Take the Cricut EasyPress mat and place your blank material on it.
- In order to protect your project and the mat, you can place a sheet of cardstock inside the apparel.
- With the help of a fresh adhesive lint-roll the entire surface. (If the apparel surface has any tiny debris or dirt, then it can ruin your project.)
- Now, place the butcher paper on your product.
- With the help of the Cricut Heat Press machine, remove the moisture from the surface of the blank product. (To learn about the perfect time and temperature, you can refer to the Cricut Heat Press app or Heat Guide.)
- Next, remove the butcher paper and let the apparel cool for a while.
Step 3: Applying Your Design on the Apparel
- Now, take your design sheet and place it on the blank product. (Make sure to keep the drawing side down, as shown below.)
- With the help of the heat resistance tape, fix each corner of the design sheet perfectly on the blank apparel.
- Moreover, keep the butcher paper on the top of the design.
- Next, heat your Cricut Heat Press machine according to the suggestion of the Cricut Heat app or Heat Guide on the website.
- Once your Heat Press machine reaches the right temperature, then apply the heat on the design for the required time.
- When you hear the beep sound on the machine carefully remove the Heat Press machine.
- Wait for a couple of minutes, and then remove the butcher paper along with the tape and design sheet.
- Finally, your Cricut ink and marker project will be complete.
Conclusion
In this blog, I have shared all the need-to-know information on using Cricut pens and markers to create beautiful projects. In addition, this blog has other info, such as necessary supplies and FAQs, that will help you understand the use of these pens and markers more profoundly. If you are planning to create a pens or marks project, the first thing you should do is gather all the supplies. So, don’t wait now grab your crafting arsenal and start working on your dream DIY craft now.
Frequently Asked Questions
Cricut infusible ink
pens & markers are specially designed DIY tools that help in creating
infusible projects. With the help of these pens & markers, crafters can
create bright, vibrant, and long-lasting projects with the heat transfer
method. Cricut infusible ink markers/pens are designed in a way that fits
perfectly on the Cricut cutting machines to write and draw on blank apparel,
paper, cardstock, and many other materials. These infusible inks are easy to
use and are compatible with all Cricut cutting machines the brand offers.
These are the steps you can follow if you want to use pens & markers for your project.
- For the first step, you have to insert the copy
sheet into your Cricut cutting machine.
- Then, head to the Cricut Design Space app and create the
design you want for your project.
- Afterward, resize the design as per your choice and
then choose the pen color.
- Proceed to the steps of drawing the design with the
help of a pen or maker.
- Once the process is finished, prepare the apparel
and Heat Press machine.
- With the help of the Heat Press machine apply the design on the apparel.
- Finally, the DIY project with pens and markers will be complete.
The follow-up list consists of the supplies you need to create a DIY craft using a Cricut pen/marker.
● Any Cricut cutting machine
● Infusible ink markers and pens
● Cricut EasyPress, EasyPress 2 or EasyPress 3
machine
● Cricut blank apparel compatible with infusible
ink
● Heat transfer tape
● Lint roller
● Cricut Design Space software (On
phone/computer)
● Cricut mat
● Butcher papers
● Laser copy paper
● Cricut Heat Guide or Cricut Heat app (The app
works with only Cricut EasyPress 3), and others.

David Madock
5+ Year of experience